Wednesday, 6 February 2013

404 Error Page in Blog


404 ERROR IN BLOGGERWith the introduction of latest search preferences by Blogger, BlogSpot blogs are now far more optimized than they used to be before. One of the features was "Errors and redirections" The "404 Error" in simple terms is a page that appears when a broken link is clicked and it tells the visitor that the page he clicked no more exits or is deleted. The error page loads inside your post body surrounded a dull grey box. By default you can only add plain text along with HTML tags inside the "Custom Page Not Found" input box using search preferences option page. The message display using this technique looks pretty ugly and we would therefore need a better approach to design a creative 404 Message for a BlogSpot blog. 

Design 404 Error Page For Blogger

The reason why a box appears around the error message is because of Blogger's default style sheet for status messages. We would therefore override the existing style sheet for the error_page alone using conditional statements. I will be using the CSS code prepared by my friend aneesh joseph which really make things simple and would add slight modifications to make the error box more attractive.
Our 404 page will prompt visitor that he has landed a wrong page and will provide him three important options which are:
  • Go Back to the page from where he came from. We will use JavaScript here.
  • Contact the Admin and inform him about the broken link. This will help you track broken links
  • And finally to provide a link to homepage.
So lets get to work to achieve all the above. Simply follow the easy steps below to display 404 error message uniquely.
  1. Go To draft.blogger.com > Settings > Search Preferences
  2. Click on Edit link next to : Custom Page Not Found
  3. Inside the box paste the following code:
<!-- MBT Default Template -->
<div class='MBT-404-box'>
  <p style='line-height: 30px'><strong>
<font color='#ff0000' size='5'>
Oops!
</font> <font color='#666666'>
Looks like you either clicked a broken link or a Page that no more exits. Kindly do one of the followings:
</font></strong></p>
  <ol style='line-height: 25px'>
    <li><a href='javascript:history.go(-1)'>&#171; Go Back</a> </li>
    <li>Report the Problem to us by <a href='http://contact.mybloggertricks.com'>Clicking Here</a>&#160;&#160;&#160; (<em>This will help us serve you even better</em>) </li>
    <li>Go To Homepage by <a href='http://www.myblog.com'>Clicking Here</a>
      <br/></li>
  </ol>
  <p>
    <br/>
    <br/>
    <br/></p>
  <p align='center'><font color='#0080ff' style='font-size: 150px'><strong>404</strong></font></p>
  <p>&#160;</p>
  <p align='center'/>
  <p align='center'><font size='5'>Page Not Found!</font></p>
</div>

         Make these customizations:
  • You can edit the bolded texts with anything you like
  • Replace http://contact.myblog.com with link of your contact page
  • Replace http://www.myblog.com with your homepage link
   4.   Click the Save changes  button and you are half way done.
    5.  Now go to Template > Edit HTML
   6.   Search for this ]]></b:skin>
    7.  Just below it paste the following code stylsheet code:
<b:if cond='data:blog.pageType == &quot;error_page&quot;'>
<style type='text/css'>
.status-msg-wrap {
    font-size: 100%;
    margin: none;
    position: static;
    width: 100%;
}
.status-msg-border {
    display:none
}
.status-msg-body {
    padding: none;
    position: static;
    text-align: inherit;
    width: 100%;
    z-index: auto;
}
.status-msg-wrap a {
    padding: none;
    text-decoration: inherit;
}
.MBT-404-box {
  background:#FFFFFF;
  width:98%;
  margin:10px 0px;
  padding:20px 10px;
  border:1px solid #ddd;
  -moz-border-radius:6px;
  -webkit-border-radius:6px;
  border-radius:6px;
  box-shadow: 5px 5px 5px #CCCCCC;
}
</style>
</b:if>
     To change the background colour of the box edit #FFFFFF
    8.   Save your template
    9.   Done!
Visit any page of your blog that do not exist to see it working just perfectly. You may type anything after your blog address to see the 404 error appearing. For example like:
http://yourblog.blogspot.com/blablabla
or
http://yourblog.blogspot.com/xyz
or
http://yourblog.blogspot.com/anything-here
etc....

What's next?

I am working on some exciting new designs for the 404 error page display and will share latest 404 templates soon.  Do let me know if you got into some trouble. Make the best out of blogger. Peace pals! :)

Syntax Highighter into Blog


SYNTAX-HIGHLIGHTERMost bloggers use the standard blockquote to share tutorials based on scripts and codes with their visitors but Alex Gorbatchev has created an amazing fully functional Highlighter that neatly displays web technologies such as HTML, CSS, JavaScript, Php, Python, Sql, xml etc. The codes are displayed line by line number wise. It also provides the user with options to Print the code, copy it to clip board or to see the code Source.
Alex has released the latest version (3.0.83) but we will use the old version (2.1.383) as it contains the options I mentioned above. Each code type comes with a script called Brush. I have used the most popular brushes as I mentioned earlier but if you wish to use a brush of your choice then you can select one from this Brush list.
Live Demo

How To Add Syntax Highlighter In Blogger?

The steps are more simple than you can imagine. I have tried to make the installation as easy as possible. Follow these steps,
  1. Go To Blogger > Design > Edit HTML
  2. Backup your template
  3. Search for this,
]]></b:skin>
     4.  And just below it paste the following code,
<!--SYNTAX HIGHLIGHTER BY MBT STARTS-->
<link href='http://alexgorbatchev.com/pub/sh/2.1.382/styles/shCore.css' rel='stylesheet' type='text/css'/>
<link href='http://alexgorbatchev.com/pub/sh/2.1.382/styles/shThemeDefault.css' rel='stylesheet' type='text/css'/>
<script src='http://alexgorbatchev.com/pub/sh/2.1.382/scripts/shCore.js' type='text/javascript'/>
<script src='http://alexgorbatchev.com/pub/sh/2.1.382/scripts/shBrushCpp.js' type='text/javascript'/>
<script src='http://alexgorbatchev.com/pub/sh/2.1.382/scripts/shBrushCSharp.js' type='text/javascript'/>
<script src='http://alexgorbatchev.com/pub/sh/2.1.382/scripts/shBrushCss.js' type='text/javascript'/>
<script src='http://alexgorbatchev.com/pub/sh/current/scripts/shYouBrushJava.js' type='text/javascript'/>
<script src='http://alexgorbatchev.com/pub/sh/2.1.382/scripts/shBrushJScript.js' type='text/javascript'/>
<script src='http://alexgorbatchev.com/pub/sh/2.1.382/scripts/shBrushPhp.js' type='text/javascript'/>
<script src='http://alexgorbatchev.com/pub/sh/2.1.382/scripts/shBrushPython.js' type='text/javascript'/>
<script src='http://alexgorbatchev.com/pub/sh/2.1.382/scripts/shBrushRuby.js' type='text/javascript'/>
<script src='http://alexgorbatchev.com/pub/sh/2.1.382/scripts/shBrushSql.js' type='text/javascript'/>
<script src='http://alexgorbatchev.com/pub/sh/2.1.382/scripts/shBrushVb.js' type='text/javascript'/>
<script src='http://alexgorbatchev.com/pub/sh/2.1.382/scripts/shBrushXml.js' type='text/javascript'/>
<script src='http://alexgorbatchev.com/pub/sh/2.1.382/scripts/shBrushPerl.js' type='text/javascript'/>
<script language='javascript'>
SyntaxHighlighter.config.bloggerMode = true;
SyntaxHighlighter.config.clipboardSwf = &#39;http://alexgorbatchev.com/pub/sh/2.1.382/scripts/clipboard.swf&#39;;
SyntaxHighlighter.all();
</script>
<!--SYNTAX HIGHLIGHTER BY MBT ENDS-->

     5.   Save your template and you are done!

How it works?

Whenever you wish to share a code of any type with your readers, simply enclose the code between these lines,
<pre class="brush:css, brush:html, brush:js, brush:php, brush:sql, brush:python">
ADD THE PARSED CODE HERE
</pre>
I have combined all brushes into one making it easier for newbie to implement the tutorial.
Note: Do not add the code directly because you will get error in Blogger Editor, instead first parse the code using the Parser Tool provided by us.
Replace ADD THE PARSED CODE HERE with the parsed/encoded code and publish your post to the see the magic.
That's it! Hope you like it. I will publish different color schemes for Syntax Highlighter in my next posts so make sure you don't miss the update. I also published some block quotes with auto number list and if you wish you can use them instead by reading this tutorial,
  • Blockquote with Auto Number List

Featured Post with Thumbnail in Blog


Hi guys. Did you wanted to have a featured post section in your Blogger blogs? You would have probably noticed that featured sections in the WordPress blogs quite often. People normally use this section to contain their top performing posts, so that they get a further boost up by those extra impressions. As many people tend to read the featured posts, this widget works quite well.
So lets see what we are going to achieve. The widget is placed at the bottom of the test blog.


Live Demo

The widget can also be seen at the bottom of MBT where you would find some really useful resources. So lets get started and add it to our blog.

Step 1: Adding The Main Code

Go to Design >> Add a Gadget >> HTML/JavaScript. Now simply add the following code in that widget:

<div id='mbtboxes'>
<div style='visibility: visible; overflow: hidden; position: relative; z-index: 2; left: 0px; width: 100%; '>

<ul>
<li>
<div class='mbtbody'>
<a class='Fadein3' href='POST 1 LINK'>
<img height='100' src='POST 1 IMG LINK' width='170'/>
</a>
<div class='clear'></div>
<h3><a href='POST 1 LINK'>POST 1 DESCRIPTION</a></h3>
<p>POST 1 PARAGRAPH</p>
</div>
</li>
<li>
<div class='mbtbody'>
<a class='Fadein3' href='POST 2 LINK'>
<img height='100' src='POST 2 IMG LINK' width='170'/>

</a>
<div class='clear'></div>
<h3><a href='POST 2 LINK'>POST 2 DESCRIPTION</a></h3>
<p>POST 2 PARAGRAPH </p>
</div>
</li>
<li>
<div class='mbtbody'>
<a class='Fadein3' href='POST 3 LINK'>
<img height='100' src='POST 3 IMG LINK' width='170'/>
</a>
<div class='clear'></div>
<h3><a href='POST 3 LINK'>POST 3 DESCRIPTION</a></h3>
<p>POST 3 PARAGRAPH</p>

</div>
</li>
<li>
<div class='mbtbody'>
<a class='Fadein3' href='POST 4 LINK' rel='nofollow'>
<img height='100' src='POST 4 IMG LINK' width='170'/>
</a>
<div class='clear'></div>
<h3><a href='POST 4 LINK' rel='nofollow'>POST 4 DESCRIPTION</a></h3>
<p>POST 4 PARAGRAPH</p>
</div>
</li>
<li>
<div class='mbtbody'>
<a class='Fadein3' href='POST 5 LINK'>

<img height='100' src='POST 5 IMG LINK ' width='170'/>
</a>
<div class='clear'></div>
<h3><a href='POST 5 LINK'>POST 5 DESCRIPTION</a></h3>
<p>POST 5 PARAGRAPH</p>
</div>
</li>
</ul>
</div>
</div>

Add Your Own Links

The widget contains 5 featured posts. So your have to configure all those posts links, images for each posts, their description and a small paragraph related to that article.

I have separated all those 5 posts areas with different colors. Note that description is the main heading for the post. So don't confuse it with a small paragraph of few lines. Check the demo if you haven't.

Post 1 | Post 2 | Post 3 | Post 4 | Post 5

Step 2: Adding CSS

Now go to Design >> Edit HTML and tick the check box. And don't forget to download your template for backup purposes.

Now search for the following code by (Ctrl + F):

]]></b:skin>


Now just above this code, add the following code:


/*----------- MBT Gallery -----------------*/

#mbtboxes{height:210px;overflow:hidden;margin:0px;position:relative;width:948px;background:; border:0px solid #333; padding:5px 5px;}
#mbtboxes ul{ margin-left: 10px; padding: 0pt; position: relative; list-style-type: none; z-index: 1;  width: 100%; }
#mbtboxes ul li{ overflow: hidden; float: left; width: 180px; height: 180px; border-top:0px solid #333; margin-right:6px; padding:2px 0px 4px 0px; }
#mbtboxes ul li:hover{ border-bottom:1px solid #c5c5c5; }
#mbtboxes img{width:150px;height:100px; padding:2px; border: 1px solid #A3A3A3; border-radius:10px; -moz-border-radius:10px;  margin-top:0px;}
#mbtboxes img:hover{border: 1px solid #c5c5c5; }
.mbtbody img{float:left}
.mbtbody {position:relative;margin:0 5px 0 5px;width:170px;height:210px;display:inline;float:left;color:#c4c4c4}
.mbtbody h3{padding:5px 0;font-size:12px;font-weight:bold; font-family: verdana, sans-serif, arial; margin:0;}
.mbtbody h3 a:link,.mbtbody h3 a:visited{color:#2F97FF;}
.mbtbody h3 a:hover{color:#c5c5c5}
.mbtbody p{margin:0; padding:0 0;color:#cdcdcd;font:10px normal verdana, sans-serif, Arial;}
.Fadein3 img {
filter:alpha(opacity=80);
opacity: 0.8;
border:0;
}
.Fadein3:hover img {
filter:alpha(opacity=100);
opacity: 1.0;
border:0;
}

Now simply save your template and would be all done.

NOTE: The images that you would link to the widget, should be 170px width and 100px in height. You may like to read :

Create Blogger Backup For Images And Get Image URLs

Customization:

Say if you want to match the widget with your colored template. You can easily do that by changing the background color code that i have made bold the coded above.

background: Your Color Code;

Or you could add a border to the widget by using 1 or 2 at most instead of value 0.
border:0px
Thats all. Hope that was useful and exciting. Waiting for your feed back.
Cheers!

Create Contact Form using File Upload Option


Email contact-formThe contact form that I am using on this blog is from emailmeform and it is all free but customized using CSS. I previously published a post on how to customize contact form provided by emailmeform but later due to change in the coding provided by them the styling do not work for new forms so today we will learn to create a simple contact form with no company Ads and along with an upload option that will allow your visitors to send you files straight from your website. The files can be a text file, video, audio, pdf, gif, png, anything. Follow these steps:
Live Demo

Create a Free Web Contact Form

Sign up for a free account at emailmeform
Once you are registered click the "Add a Form" button and choose the form builder option.
add form
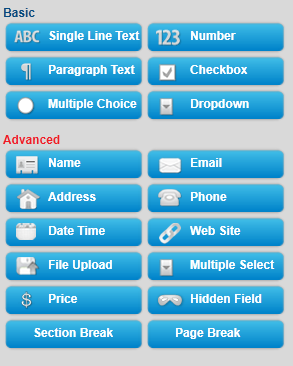
Keep your form simple with some important fields only like Name, Website URL, Email, Age, Country, Subject and Message. The form builder looks like this,
form builder
The form builder has blue buttons at left and display at right. When you click a button on left the effect is displayed on right. Now kindly follow as I instruct for keeping things simple and for creating a simple but informative contact form.
Follow this order:
  1. Click the Name button in advance section
  2. Next click Web site
  3. Next Email
  4. Next Hidden Field. Now click the hidden field section on the right and rename it as Age
  5. Next click Hidden Filed again and rename it as Country
  6. Next click File Upload  (Optional you can leave this option if you don't want users to send you files via email)
  7. Now From the Basic section click Paragraph Text & click it to rename it as Message
  8. To make a specific form option a must to fill then simply click that row and select required as shown below
edit form fileds

Your contact form now must look something like this:
contact-form
     9.   Click the Form Title and add some message there for your visitors. For example you can write :
We Love To Hear From You
Feel free to ask for any help. We will catch you back as soon as time allows
If you wish you can remove the form title by unchecking the box and deleting the description text. See below
contact form title
     10.    Now on the form settings choose Redirect URL and insert the page link of your thank you page. A thank you page is something like this
redirect contact form
You may create a separate post for this by giving it an old publishing date. Blogger users can create a Page instead of Post.    
11.  Now replace send Email by submit and align it to right as shown below:
submit button
  12.  Next click the Captcha Code at the bottom and select the none option from the left section as shown below:
remove captcha-code
This security code is often added to prevent spam but I have never used this security code and I honestly have received not even a single spam till today. Just remove it to make the contact form even more neater.
13.   Finally hit the Save Form Button and a window will appear as shown below:
save form
14.   Choose the second option and add a recipient email ID. Choose an ID that you often use so that whenever someone leave a message you may receive it straight in your inbox. You can also add more than one recipients. See below:

Leave other options as default. Hit Save! Now choose the third option.
save contact form
15.   In Form manager Click Code
contact-form-code
16.  Choose the HTML Only option and copy the code. Make sure to enter the URL of the page where you want to embed the contact form. See below
copy code
It is therefore better that first you create a Page on Blogger and publish it. Fetch its URL and paste it in the blank "Enter URL where form is embedded"
Now simply copy the code and paste it in your contact page. To delete the emailmeform logo from the contact form find and delete a similar code like the one below from the code you just copied.
  <div><font face="Verdana" size="2" color="#000000">Powered by</font><span style="position: relative; padding-left: 3px; bottom: -5px;"><img src=
  "http://www.emailmeform.com/builder/images/footer-logo.png" /></span><font face="Verdana" size="2" color="#000000">EMF</font> <a style="text-decoration:none;" href="http://www.emailmeform.com/"
  target="_blank"><font face="Verdana" size="2" color="#000000">Forms Online</font></a>
</div><a style="line-height:20px;font-size:70%;text-decoration:none;" href="http://www.emailmeform.com/report-abuse.html?http://www.emailmeform.com/builder/form/r99G329aiV6k6" target=
"_blank"><font face="Verdana" size="2" color="#000000">Report Abuse</font></a>
Publish the page and bingo you are done! I know the steps are lengthy but the result is indeed worth it. In my coming posts you will learn how to completely customize this contact form with your own colors and styles. See our contact form as an example. I just hope you may have found today's tutorial helpful. If you need any help please do not hesitate to post your question. Have fun buddies! :)
Note: Paste the Contact Form code in Edit HTML mode only and hit the publish button on blogger Post Editor. Do not toggle to compose mode because this will collapse the form.
You may also find our previous tutorial helpful:
  • Create Contact Form

Drop Down Menue in Blogger


Update: We have published almost 9 more menus like this one. To get them all just use the search box and type drop down menu. If you wish to add the same menu to Blogger Template Designer templates then read this post -> Custom Drop Down menu

image
Why do you run after scripts such as jquery while you can use simple CSS and HTML to create beautiful drop down menus for your blog. I already shared a list of 30 Navigation menus and now you need to learn how to create a drop down menu in a navigation. I am sharing a simple code here that can be fully customize to make your preferred changes. So lets get to work!


Live Demo


How To Create a Drop Down Menu?

A drop down menu is needed when you have too much content on your blog or you love keeping things organized. To add a drop down menu to your blogger blogs do this:
  1. Go To Blogger > Design > Page Elements
  2. Select a HTML/JavaScript Widget just under the header and paste the following code inside it,
drop down menu
<div id='mbtnavbar'>
      <ul id='mbtnav'>
        <li>
          <a href='#'>Home</a>
        </li>
        <li>
          <a href='#'>About</a>
       </li>
        <li>
          <a href='#'>Contact</a>
        </li>
  <li>
           <a href='#'>Sitemap</a>
            <ul>
                <li><a href='#'>Sub Page #1</a></li>
                <li><a href='#'>Sub Page #2</a></li>
                <li><a href='#'>Sub Page #3</a></li>
              </ul>

        </li>
      </ul>
    </div>
Replace # with your Page Links and the bolded text with relevant page names. The yellow highlighted code is responsible for the drop down menu. You can copy and paste it under any tab you want just before </li>
To add another tab just paste this code above </ul>
<li>
          <a href='#'>Tab Name</a>
        </li>
       
    3.   Now Go to Design > Edit HTML
    4.   Backup your template and search for ,
]]></b:skin>
     3.   Just above it paste the code below,
/*----- MBT Drop Down Menu ----*/

#mbtnavbar {
    background: #060505;
    width: 960px;
    color: #FFF;
        margin: 0px;
        padding: 0;
        position: relative;
        border-top:0px solid #960100;
        height:35px;
}

#mbtnav {
    margin: 0;
    padding: 0;
}
#mbtnav ul {
    float: left;
    list-style: none;
    margin: 0;
    padding: 0;
}
#mbtnav li {
    list-style: none;
    margin: 0;
    padding: 0;
        border-left:1px solid #333;
        border-right:1px solid #333;
        height:35px;
}
#mbtnav li a, #mbtnav li a:link, #mbtnav li a:visited {
    color: #FFF;
    display: block;
   font:normal 12px Helvetica, sans-serif;    margin: 0;
    padding: 9px 12px 10px 12px;
        text-decoration: none;
       
}
#mbtnav li a:hover, #mbtnav li a:active {
    background: #BF0100;
    color: #FFF;
    display: block;
    text-decoration: none;
        margin: 0;
    padding: 9px 12px 10px 12px;


}
#mbtnav li {
    float: left;
    padding: 0;
}
#mbtnav li ul {
    z-index: 9999;
    position: absolute;
    left: -999em;
    height: auto;
    width: 160px;
    margin: 0;
    padding: 0;
}
#mbtnav li ul a {
    width: 140px;
}
#mbtnav li ul ul {
    margin: -25px 0 0 161px;
}
#mbtnav li:hover ul ul, #mbtnav li:hover ul ul ul, #mbtnav li.sfhover ul ul, #mbtnav li.sfhover ul ul ul {
    left: -999em;
}
#mbtnav li:hover ul, #mbtnav li li:hover ul, #mbtnav li li li:hover ul, #mbtnav li.sfhover ul, #mbtnav li li.sfhover ul, #mbtnav li li li.sfhover ul {
    left: auto;
}
#mbtnav li:hover, #mbtnav li.sfhover {
    position: static;
}
#mbtnav li li a, #mbtnav li li a:link, #mbtnav li li a:visited {
    background: #BF0100;
    width: 120px;
    color: #FFF;
    display: block;
    font:normal 12px Helvetica, sans-serif;
    margin: 0;
    padding: 9px 12px 10px 12px;
        text-decoration: none;
z-index:9999;
border-bottom:1px dotted #333;
   
}
#mbtnav li li a:hover, #mbtnavli li a:active {
    background: #060505;
    color: #FFF;
    display: block;     margin: 0;
    padding: 9px 12px 10px 12px;
        text-decoration: none;
}
Make these changes:
  • Change #060505 to change background color of the Main menu
  • Change  the yellow highlighted text to change font color, size and family
  • Change #BF0100 to change the background of a tab on mouse hover
  • Change #BF0100 to change the background color of the drop down menu
  • Change #060505 to change the background color of drop down menu on mouse hover
      4.    Save your template and you are done!

Visit your Blogs to see a beautiful Navigation menu just below Header. Have Fun! :)

Feedburner Recent Comment Widget Blogger


 Feedburner Recent Comments WidgetJust few months back I wrote a post on how to add a Recent Posts Widget by Feedburner to your Blogger and Typad blogs and today we will learn a similar tutorial based on a really attractive and fast loading Recent Comments widget offered by Feedburner. This widget is really fast loading in a sense that it is well scripted and the JavaScript it uses is stored on feedburner’s server so there will be no load time delay on your blog. You have seen this widget hanging on my sidebar inside the multi-tab widget. So lets learn how to add it to blogger.
To add the Recent comments Widget By Feedburner to your blogs follow these steps,

Burn Your Comment Feed At Feedburner

1.  Login To Your Feedburner Account. Incase if you don’t have one simply sign up for a free account.
2.  Insert your Comment Feed URL inside the Feedburner box. The URL for Blogger Blogs will be like this,
http://YOUR-BLOG-NAME.blogspot.com/feeds/comments/default
Replace YOUR-BLOG-NAME with your blog’s good name.Burn-your-feed-box
3.  Press the Next Button and you will be brought to a new page. Simply insert an easy memorable Feed title and feed address. I prefer both to be the same.
Feed-title-and-address

4.  Press Next and then fill the two options on the new page as shown below,
choose-feed-options

5.  Finally press the Next button again and you have successfully burnt your comment feed!
  • Now click the publicize button just at the top
publicize-button
  • On the left sidebar click BuzzBoost
buzzboost
  • Hit The Activate button on the right pane
activate
  • Then fill in the options as shown below,
recent-comments-widget-sett
Its advisable to leave all boxes unchecked.
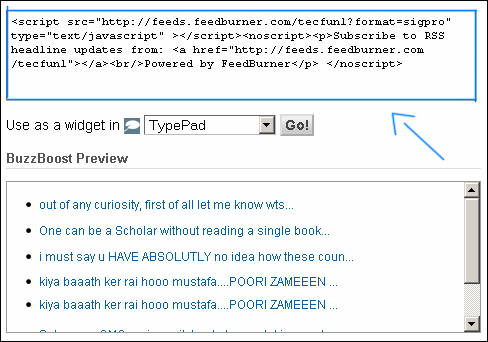
  • Finally click the save button and get your HTML code which will be just at the top of the page as shown below,
Widget-code
  • Done!
Adopt a similar procedure for Typad

How to Add the Recent Comments Widget To Blogger

Now once you have copied the code for your recent comments widget then simply follow the steps below,
  1. Log into Blogger
  2. Go To Layout
  3. Click Add a Gadget or Add a Page element
  4. Choose HTML/JavaScript Widget
  5. Now paste the Feedburner code inside this widget and hit save
  6. Done!
Finally Preview your template to see it hanging on your sidebar :>

Create Custom Comment Box in Blogger


Customize-Blogger-comment-form Today's tutorial is the most demanded and most wished but rarely answered in blogosphere. For some designers customizing the Blogger Comment Form is somehow not possible whilst for others it is tricky but from today onwards InshAllah every blogger will actually be able to customize the Blogger Comment Form in the best way possible! After some trial and errors we actually succeeded in altering Blogger’s official CSS coding. We are happy to have brought you with a tutorial that will indeed enable you to have a customized Comment Form far better than that of Wordpress, Typad etc.
Blogger Comment Box Series
1. Customize Blogger Comment Form
2. Comment Form with Black Background Theme - Just like ours!
3. Over 1000 Background Themes For Blogger Comment Box!
4. Expand/Contract Blogger comment Box with jQuery

Please have a look at some examples below,

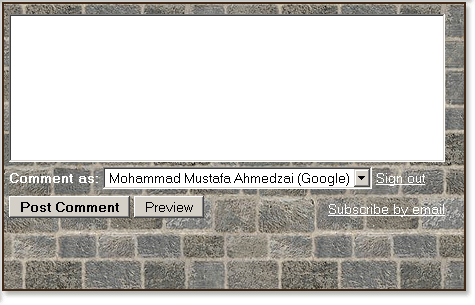
Brick Style Comment Form

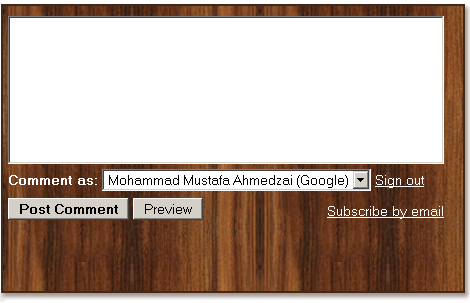
Wooden Style Comment Form

Now Hover Your Mouse Cursor at these comment forms for 3-4 seconds to see something different!

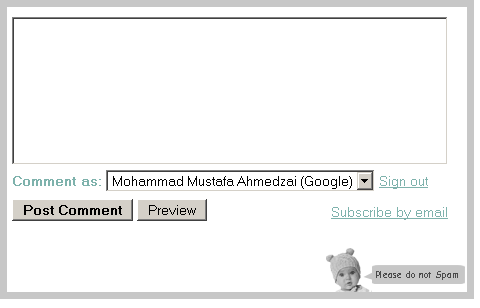
Baby Comment Form with message for spammers
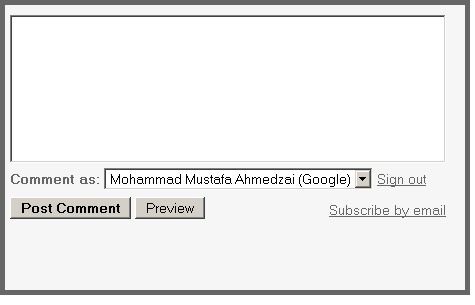
Simple Comment Form with message for spammers


Orange Comment Form with message for spammers
We hope you liked this new discovery! Lets now learn how to customize the blogger comment form/box to suit your preferences.

Adding A Customized Comment Form To Your Blog

Note:- The Following CSS code is for the Comment Form With a Baby in it. Other CSS codes will be provided to subscribers only. If you haven’t subscribed yet kindly subscribe now and inform us by leaving a comment with your Email ID.
Follow these steps,
  1. Go To Blogger > Layout > Edit HTML
  2. Check The Box “Expand Widget Templates” at the top right corner.
  3. Search for the code below,                                  Tip:- Press Ctrl + f
<div class='comment-form'>
     4.   Replace this code with the code below,
<div id='mbt-form'>
     5.   Now Search for ]]></b:skin>
     6.   Just above ]]></b:skin> paste the CSS code below,
#mbt-form iframe{
background:#ffffff url(https://blogger.googleusercontent.com/img/b/R29vZ2xl/AVvXsEg7T-IatrO6O5TKkNNSH5YDyfat0x4MDBppmDTjfHXVpO0JoGI8N0yA7-qrWH7FoM7RJTRODj1YywdlU0jBdQr0F0piSob9NCA4YEbViZqHpwf2mP1B_TVoM9JRR3Jf-oEeZsFCnrpL28ew/s400/plz-do-not-spam1.gif) no-repeat bottom right;
border:7px solid #C7C7C7;
padding:5px; font:normal 12pt "ms sans serif", Arial; color:#7EB2AC; width:450px; }
#mbt-form iframe:hover{
background:#ffffff url(https://blogger.googleusercontent.com/img/b/R29vZ2xl/AVvXsEhPKC4ykzYK6vstZ1NpY_gCws-EATa-fKpgp5g4Me-6L8s98hkTyADgpS-4jbDvmlmMibAsdSf5J_x3n3GB2QDvfO4NZG1HXL3uh9UnRd9LAoCQASrd0K2_7-W-EQa36_TNEv_q_Igi3Mf7/s400/plz-do-not-spam2.gif) no-repeat bottom right; border:7px solid #7EB2AC;
}
#mbt-form a{
color:#7EB2AC;
}
     7.     Save your template and view your blog to see a different touch :>

Customize The Blogger Comment Form To Suit Your Blog Layout

Now Lets discuss the important areas in the CSS code above to help you customize your Blogger comment form according to your preferences.
There are three important areas, which are,
#mbt-form iframe
#mbt-form iframe:hover
#mbt-form a
Here are the details for each section
1.    Customization For Active Mode
#mbt-form iframe
This part is responsible for the active appearance of comment box when mouse cursor is not hovered on it. It includes the following style properties,
background: This property is responsible for the background color, background image and background image’s position. Where,
  • #ffffff : This is the background color. You can change it using our Color Chart
  • url : This is the URL for the background image. I used the baby in this case. You can change this image with anything you like.
  • bottom right: This positions the background image. I positioned the baby on bottom right corner. You can position the image at bottom right or bottom left or top right or top left
border: This CSS property defines the border size/width, style and color of the comment box. I have set these values for the Comment form in active mode(not on mouse over),
  • border size to 7px,
  • border style to solid. You can choose solid, dotted, dashed etc. See this page on border styles
  • border color to  #C7C7C7. Use our CSS Color Chart for using a different color.
padding: This CSS property is responsible for the distance/gap between the Comment Form border and its text area. You can increase this value if you wish to insert an image at top right or top left corner of the form.
font:  This CSS property defines the boldness, font family and the size of the text. I have set the following for the text “Comment as:”
  • boldness to normal,
  • size to 12pt 
  • font family to  "ms sans serif". If in case the browser doesn’t has the "ms sans serif" font then I have set Arial as a backup.
color: This property defines the color of the text “Comment as:” . Use our Color Chart for changing the text color.
width: This property sets the width of your Comment Form. You can see the comment from of my blog is wider than normal because I have adjusted its width. Set the width of your comment form a bit smaller than that of your post width. You can find your post width by finding the following code in your template (Edit HTML)
.post

2.  Customization For Mouse Hover Mode Now lets discuss the CSS properties for the form’s appearance when a mouse cursor is hovered on it.
#mbt-form iframe:hover
It has almost the same explanations for background and border as we discussed earlier. Setting these two CSS properties will effect the second image only that appears on mouse hover.
3. Customization For The Link Colors
#mbt-form a
This part defines the color of these two links -> “Sign out” and “Subscribe by email” . These links appear at bottom right corner of every Blogger Comment Form.
color: This sets the link color. Set a link color as contrast to the background color.

That’s All!
I hope this tutorial will be of great help to bloggers and designers. We request everyone to kindly link back if you wish to share this unique tutorial with your readers and friends. We thank you for your patience.
Any question is welcomed :>

Tuesday, 5 February 2013

Create Email address free with Google Apps


create Email with google appsOne of the very first things that any web owner likes to do after purchasing a domain is setting up a branded Email address ending with the domain name. Blogger users who purchase a domain often find it difficult to set the MX records in their webhosting account, thus they don't bother using a branded email address. If your website address is www.example.com then your branded email Id would look like yourname@example.com. You will be able to access it using the address mail.example.com. The best thing about todays' tutorial is that we wont be using inefficient webmail services like roundcube, squirrelmail or horde that you often find in your hostgator webmail clients. We will be using Gmail, which means you will manage all emails received at your website's email address straight in your very own custom Gmail account. You can also create up to 10 email addresses using your domain without paying a penny with Google Apps. You will stay safe, protected and most importantly served well.  Lets now create a Gmail account for your company's website or blog and connect it to your web host in easy steps.

Google Apps Services 
Part1: Create Free Email address For your domain with Google Apps
Part2: Google Short Links - Create Shortcuts to URLs
Part3: Create short URL For Email & other services in Google Apps
Part4: Connect your Website Emaill address To Gmail
Note: This post may seem too much techy but its really simple to apply and all fun! So act like tomb boys and give it a try. :)

Steps To Create a Gmail Account For a Website

You will get a free 10GB storage to save all your emails no matter how loaded they may be with rich media.
Follow these easy steps:
  1. Go To Google Apps for Domains
  2. Submit your website address without typing http://
  3. Then fill up the vacant blanks with required information. Keep your username simple because this will be attached to your domain name to create your custom Gmail account username. In my case I choose Mohammad for my sister blog.
setup email with googleapps
      4.  Keep Alternate email address the same as your personal Gmail ID or any ID  that you use frequently.
      5. Click the submit button to create your account

      6. You have now successfully created an account with Google apps. Now you need to verify that you actually own the domain. You will be given two options Express and Custom. Choose express.
express and custom googleapps
   7.   Click the next buttons till you get to Domain verification page. Here you get 5 options to verify your domain which are:
  1. Upload HTML File      (Recommended Method)
  2. HTML Tag            (under alternate Methods tab)
  3. Google Analytics       (under alternate Methods tab)
  4. Domain Name provider       (under alternate Methods tab)
Choose the second option of HTML Tag because it is the easiest of all. Copy the simple Meta tag and paste it inside your template just below <head> section.
Tip for Genesis Users:
Once done, hit the verify button and you are half done.
domain verified
Click the continue link and you will be taken to Google Apps Setup wizard. You may keep all options default and keep clicking next till you reach setup Gmail:
set up gmail
Choose other from the drop down box which says "Choose your Host" Click Next
Setting up MX Records
Here you will be given four MX entries that you need to submit to your webhost.
MX records
You will need to log into your web host account and navigate to DNS Manager or DNS settings. DNS zone is also called DNS Management, Mail Server Configuration, or Name Server Management, depends on your webhost. I will be sharing here the settings for hostgator here which will give you a clear observation on what to do.
Setting For HostGator:
  1. Log in your Control Panel
  2. Click the MX entry icon just under Mail
  3. Choose your domain
  4. Set Email routing to Automatically Detect Configuration
  5. Now enter 5 MX entries one by one inside the Records box.  These MX entries are given to you by Google apps. While entering the destination remove the dot in the end. For example ASPMX.L.GOOGLE.COM. should be entered as ASPMX.L.GOOGLE.COM
MX entry hostgator
     5.  When everything has been entered correctly it will look like this:
MX entries for googleapps
Note: If an MX entry exists by default, you may delete it and keep only the above 5 MX entries. It will take 24 hours for your Email to connect to Google servers so be patient
Go back to Google apps and keep on clicking next till you complete the wizard. Though completing the setup wizard is not necessary but to avoid the irritating prompting messages better complete it.
Congratulations! You have now successfully created a custom Gmail address for your website. .

Create Custom Email Web Address

To access your account you will need to follow a standard long web link. Ours looks like:
https://www.google.com/a/cpanel/smartearningmethods
In our coming tutorials we will learn to create a more professional and short web address like this one:
mail.smartearningmethods.com
Stay tuned!

Connect your Gmail Accounts

The Gmail account you just created is different from your primary Gmail account that is used for personal use. In order to manage this new account using your primary account we will need to connect these two accounts so that all mails sent to yourname@example.com are received at yourname@gmail.com. For this you will need a Gmail account as your primary mailing service. It wont work with Hotmail or Yahoo. To learn how to do this please stay tuned for tomorrow's tutorial.

Need help?

If you need help in any part of this tutorial please do not hesitate to post your query. I just hope you find this guide helpful and easy to implement. Wish you guys a happy branded emailing experience. Stay happy and healthy. Peace! :) 

Add Comment Box Facebook in Blogger

1. If you wish to completely hide the blogger comments form then read Replace Blogger comments form With Facebook

2. Show both Facebook and Blogger Comments inside Tabs! 


facebook-comments-boxIn 2009 Facebook developers introduced their best social plugin called "Facebook Comments Box". This plugin can be embedded in any website or blog and visitors can use their IDs of Facebook, Yahoo, AOL or Hotmail to leave a comment at your site. This plugin did show a lot of problems when it was embedded in Blogger Blogs in initial days of its development but now thanks to our fellow friend Max from Allblogtools this plugin has been finally bloggerized to work just perfect with any Blogger hosted blogs. I have edited Max's coding in some areas and have mentioned some more interesting options that will help you use the Facebook comments box in parallel to your old Blogger Comment form so that you may loose no previous comments and provide users with multiple options of commenting from different platforms.


Live Demo

This is how the Facebook Comments box looks like,
LIGHT SCHEME
facebook-commentS-box LIGHT
DARK SCHEME
Facebook-comments-dark-scheme

Interesting? Lets now learn how to embed this extremely useful comment form in Blogspot blogs. Kindly follow the simple steps below,

1- Get a Facebook Application ID

  1. Go To Facebook Developers Page
  2. Submit your blog URL and give it a name. Keep Site name as your "Blog Title" and Site URL as your "blog address"
site-url
     3.   Hit "create app" button and proceed
     4.   After submitting the security check code you will see this page,
app-id
       5.   Save that App ID in a notepad because we will need that latter. Now Click the link near the top-right corner of the same page that says "Developer Dashboard"
image
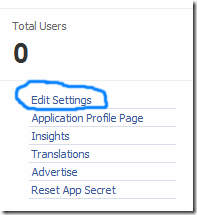
      6.  One the new window that appears click the Edit Settings link ,
edit-settings
        7.  Then go to Website option and write your Site Domain as blogspot
website
       8.  Save Changes and jump to the next step of this tutorial

2- Adding the Facebook comments Box to Blogger

Now its time to do embed the comments box in your blog templates. So follow these easy steps,
PS: Please make sure your blogger comment form is embedded below posts. For doing this first go to Blogger > Settings > comments > and then choose embed comments below posts. After doing this follow the tutorial below.
  1. Go To Blogger > Design > Edit HTML
  2. Backup your template
  3. Check the "Expand Widget Templates" box
  4. Search for <html and just after it give a space and add this code,
xmlns:fb='http://www.facebook.com/2008/fbml'
  5.  Next search for 
<body>
Note: In New Blogger Designed templates the same code looks like this,
<body expr:class='&quot;loading&quot; + data:blog.mobileClass'>
Find any one of these codes and just after it paste the code given below,
<div id='fb-root'/>
<script>
    window.fbAsyncInit = function() {
    FB.init({
      appId  : &#39;YOUR_APP_ID&#39;,
      status : true, // check login status
        cookie : true, // enable cookies to allow the server to access the   session
      xfbml  : true  // parse XFBML
    });
  };
    (function() {
    var e = document.createElement(&#39;script&#39;);
      e.src = document.location.protocol +   &#39;//connect.facebook.net/en_US/all.js&#39;;
    e.async = true;
      document.getElementById(&#39;fb-root&#39;).appendChild(e);
    }());
</script>


  • Replace YOUR_APP_ID with your Facebook application ID that you saved in a notepad.
    6.    Next search for  </head> and just above it paste the following code,
<meta expr:content='data:blog.pageTitle' property='og:title'/>
<meta expr:content='data:blog.url' property='og:url'/>
<meta content='MY Blogger' property='og:site_name'/>
<meta content='BLOG-LOGO-IMAGE-LINK' property='og:image'/>
<meta content='YOUR_APP_ID ' property='fb:app_id'/>
<meta content='http://www.facebook.com/mybloggertricks' property='fb:admins'/>
<meta content='article' property='og:type'/>


Make these changes:
  • Replace MY Blogger  with your blog title/Name.
  • Replace BLOG-LOGO-IMAGE-LINK with the image link of your logo. Your logo will look good if it is in gif format and having this size ->  40px by 40px . This logo will appear next to your post title on Facebook profiles of your visitors like this,
logo
  • Replace YOUR_APP_ID  with the your Facebook Application ID that you saved in notepad
  • Replace http://www.facebook.com/myblog with your Facebook user profile link
    7.    Now Search for this,
<b:includable id='comment-form' var='post'>
    8.    Just after it paste the code given below,
<b:if cond='data:blog.pageType == &quot;item&quot;'>
<div style='padding:0px 0px 0px 0px; margin:0px 0px 0px 0px;'><script src='http://connect.facebook.net/en_US/all.js#xfbml=1'/>
<div> <fb:comments  colorscheme='light' expr:href='data:post.url' expr:title='data:post.title' expr:xid='data:post.id' width='520'/></div>
<div style='color:#fff; background-color:#3B5998;border: solid 1px #ddd; font-size:10px; padding:3px; width:510px;'>Facebook Blogger Plugin: Bloggerized by <b><a alt='blogger templates' href='http://www.allblogtools.com/' style='text-decoration:underline; color:#fff;' target='_blank' title='blogger templates'>AllBlogTools.com</a></b> Enhanced by <b><a alt='blogger widgets' href='http://www.mybloggertricks.com/' style='text-decoration:underline; color:#fff;' target='_blank' title='Blogger Widgets'>MyBloggerTricks.com</a></b></div></div>
</b:if>
  • If you want to use the dark scheme then simply replace light with dark
  • To change the Comments box size, change this value width='520'
  • To change the footer credits size, change this value width:510px
  • Keep a difference of 10 pixels between the box size and footer size. For example if you set box-size to width='600' then set footer-size to width:590px

      9. Save your template and Bingo you are Done! See your blogs to find a beautiful comment box waiting to be touched. =)

Respect Copyright

This plugin contains credits to allblogtools blog for the efforts put by us in facilitating blogger users with this great commenting plugin. We therefore request you to please do not remove the footer credits. The credits are attached to the plugin in a design style that it perfectly blends the colour themes of Facebook Comments Box. We only need this favour in return.

Need More Fun?

If you want to further play with codes and wish to give a Facebook style (i.e font colours, background colors, background image) to your old blogger comments form then read the post below,
  • Customize Blogger Comment Form!

Troubleshooting

If you faced any problem then kindly do not hesitate to let me know. It would be a pleasure to be at your service. I will write more tutorials on this topic this week so that you may get all the latest updates. I hope this plugin proves useful to most of you and it may bless your blogs with even more organic traffic. Peace! :>